Most problems I’m called to investigate on flatwork and slabs trace back to one belief that refuses to die: people think concrete cures by drying. They treat it like paint, or like damp soil under a hot sun. They chase early strength with heat and airflow, pull blankets too soon, and tell crews to “let it breathe.” Then they wonder why the surface checks like cracked porcelain, or why the slab dusts under a forklift. Concrete does not cure by losing water. It cures by chemical reaction, and that reaction needs enough internal moisture and moderate temperature to run to completion.
Once you separate curing from drying in your mind, a lot of stubborn field puzzles start to make sense. Early curling on a warehouse floor, crazing that shows up only after the first burnish, flaky edges at joints, mixed results with curing compounds, cores that test at 5,500 psi at 28 days but edges that spall after winter. Every one of those has a curing story behind it, and usually a drying mistake somewhere in the first week.
Curing is chemistry, drying is transport
Curing is hydration, the reaction between cementitious particles and water. Hydration produces the calcium-silicate-hydrate gel that gives concrete strength and lowers permeability. Drying is moisture movement out of the pore structure into the environment. Those processes can overlap in time, but they are not the same and they often work against each other.
Think about a 6-inch slab placed at 0.45 water-cement ratio. The mix has roughly 0.36 pounds of water per pound of cement needed for full hydration. On paper, that’s enough water to completely hydrate the cement. In practice, if the surface is open to sun and wind, the first few millimeters can lose water faster than capillarity can resupply it from below. Hydration slows at that face, microcracks form under tensile stress, and you lock in a weaker, more permeable surface layer. The core keeps hydrating and gains strength, which is why your 28-day lab break might look fine while the top 1/8 inch turns into chalk.
A drying mindset accelerates evaporation. A curing mindset preserves moisture and temperature long enough to build structure. Concrete contractors who understand this difference choose tools and methods that favor hydration, then manage drying later when it serves a purpose, like floor covering installation.
Why the drying mistake is so common
Two reasons. First, concrete looks wet and then looks dry, so it invites the analogy. Second, many schedules reward fast access more than long-term performance. When a superintendent needs to put scissor lifts on a slab by Friday, “get it to dry” sounds like a plan, even if it sabotages abrasion resistance and long-term curl control.

Add in mixed habits passed down on crews: fogging used like a magic mist that does little in wind, blankets thrown on hot concrete without venting, curing compounds sprayed thin to stretch a pail across another bay, fans pointed at shiny slab edges at sunset. These are the day-to-day decisions that separate durable work from callbacks.
What actually builds strength
Strength is not about moisture leaving, it’s about hydration continuing. Hydration proceeds as long as there is available water and a reasonable temperature, typically 50 to 80 F in the paste. At 70 F internal temperature with adequate moisture, hydration moves quickly with a strong early slope. At 40 F, everything slows. At 90 F and windy, the surface dehydrates, capillary porosity freezes in, and strength potential at the skin is permanently reduced.
In the lab, when a cylinder is cured in a moist room at 73 F and 100 percent relative humidity, the cement has ideal conditions to hydrate for days and weeks. In the field, the top quarter-inch of a slab might see 15 percent relative humidity by midafternoon if you “let it breathe.” That divergence explains why field performance rarely matches lab breaks when surface curing is weak.
Evaporation rate is the number to watch, not air temperature alone
I have watched good crews pour in heat waves with no issues because they respected the evaporation rate, and I have seen winter pours fail at the surface after a dry north wind. The classic ACI nomograph or any decent smartphone app will give you the evaporation rate if you plug in air temperature, concrete temperature, relative humidity, and wind speed. At or above about 0.2 pounds per square foot per hour, you are in danger of plastic shrinkage cracking before final set and serious early desiccation in the paste. I start mitigation below that if I see wind gusts or low humidity coming, because edges, ridges, and high-slump strips lose water faster than the math suggests.
Mitigation isn’t complicated, but it must be timely. Lower the concrete temperature with chilled water or ice in the mix if possible, erect wind breaks on open sides, use evaporation retarders correctly, and fog the air above - not the surface itself to flood - while finishing. Most of all, move quickly to effective curing once final finishing is done.
Membranes, water curing, and coverings: what works
Selecting the right cure method is like picking the right trowel. It depends on the specifications, finish, schedule, and climate, and on whether you need a moisture-vapor-emission-friendly surface for coverings later.
Water curing by continuous wetting or saturated coverings is still the gold standard on many structural elements. Keeping the surface at near 100 percent relative humidity for 3 to 7 days lets hydration proceed and greatly reduces early-age shrinkage. On flatwork where aesthetics or slip resistance matter, this is the most forgiving approach, provided you protect against staining and calcium hydroxide deposition. The pitfall is intermittent wetting that cycles the surface, encouraging crazing. If you cannot keep it wet continuously, do not start and stop.
Membrane curing compounds can be excellent if applied at the right rate and time. Many contractors put down half the can, then blame the material when the slab blotches or dusts. Check the solids content. A 30 percent solids resin will need more volume per square yard than a 15 percent formulation to achieve the right film. Apply evenly to refusal on a surface that has lost its sheen and won’t be marred by foot traffic. Too early and you trap bleed water under a skin. Too late and the pores are already thirsty. For troweled floors, cure and seals can add sheen but may be incompatible with adhesives later. If flooring is coming, either select a curing compound that is explicitly compatible and removable, or plan for wet curing or sheet curing plus later testing for moisture.
Sheet or blanket curing has improved with modern materials. White opaque polyethylene reflects heat and limits temperature swings on outdoor pours, which will help keep thermal gradients down and reduce curling. On interior slabs, breathable curing blankets that are saturated and sealed at the edges are reliable. The trick is sealing. I see too many corners flapping open, which sacrifices the first few feet along the perimeter - precisely where traffic is heaviest and dusting shows up first.
Early finishing habits that either set you up or sink you
The best cure plan cannot save a slab that was finished like a pan of brownies. You can see the fingerprints of bad finishing years later when forklifts carve out the surface or a winter of deicing salts exposes the top aggregate.
Avoid shaking dry cement or cement-rich sweep on the surface to “tighten it up.” That old habit starves the top paste of water and creates a weak, thin layer that delaminates. Air-entrained mixes are especially sensitive to this mistake.
Don’t burn hard in hot, dry wind. Hard troweling creates a dense surface that can be strong, but only if the paste beneath has enough moisture and has not been scoured by evaporation. In hot weather I prefer to delay the first trowel slightly, use pans rather than blades early, and keep the air above the surface at high humidity with gentle fogging. A single extra pass at the wrong time will cost more than an hour of curing labor.
Edging and joints deserve the same moisture care as the field. Joints act like chimneys for water loss. If you are saw cutting the same day, make sure the curing method can be reinstated immediately, either by reapplying membrane compound along the joint or taping the blanket and wetting beneath again.
The clock that actually matters
Specifications often say “cure 7 days” or “cure 3 days at 70 F” or “until 70 percent of 28-day compressive strength.” Those are different triggers, and they lead to different decisions. If you care about long-term performance, think in terms of degree of hydration. Hydration depends on time and temperature. The maturity method links temperature history to strength development, and you can use it with embedded sensors to know when a slab has reached a target. That is a better guide than a calendar page.
For flatwork exposed to hard use, a continuous cure for the first 3 days is the minimum I am comfortable with in moderate weather. In heat or wind, I extend to 7. On structural elements, 7 days still earns its reputation as the interval where most of the easy gains happen. The top quarter-inch, however, is the special case; it needs protection right away. If the first 24 hours are neglected, no amount of later wetting makes up for lost hydration at the skin.
Moisture for flooring: when drying finally matters
If you install resilient flooring, carpet, or wood over slabs, moisture content and vapor emission become the governing constraints. This is where drying - not curing - drives your schedule. The art is to cure first, then dry. Concrete companies and general contractors too often flip the order and end up with a surface that is quick to test dry but permanently weak at the top.
A well-cured slab may take longer to meet a 75 percent in-situ RH target than a slab that was allowed to desiccate, particularly if the mix had a high water-cement ratio or if there is no vapor retarder beneath. But the slower path yields a more stable floor. If you must accelerate drying, use controlled dehumidification, keep the space temperate, and avoid heat-only approaches that create gradients and curling. Before any floor covering goes down, rely on in-situ RH probes at the correct depth per the standard, not just surface electrical impedance readings. Strong early curing, then managed drying, pays for itself the first winter a wood floor stays flat.

Curing and cracking: what you can prevent and what you can’t
Hydration and temperature control reduce plastic shrinkage cracking and early-age cracking due to thermal gradients. They do not prevent all cracking. Long-term drying shrinkage, restraint, re-entrant corners, and poorly detailed joints will still create cracks even in well-cured concrete. What curing does is limit the width and severity, makes the paste denser and more resistant to ingress, and reduces the risk that harmless hairlines become spalls.
When a slab curls, the top shrinks faster than the bottom, either from early drying or from thermal contraction. You can see this after a sunny day when the slab lifts slightly at joints by evening. Better curing slows and evens out the moisture loss across the depth and limits temperature swings at the surface. That is why white curing covers on exterior work are not window dressing; they reflect solar gain and reduce the top-to-bottom gradient that drives curl.
The economics that matter to Concrete Companies
Profit hides in the first 48 hours. Strong curing reduces callbacks, grinding, densifier overuse, and slab replacement. If you place 50,000 square feet of warehouse floor per month, and poor curing forces you to densify twice and polish harder to control dusting, the extra passes can cost one to two dollars per square foot over the project, sometimes more. One crew day spent erecting wind breaks, applying the right curing compound at the right coverage, and sealing blankets pays for itself on the first bay you do not have to rework.
Crew culture matters. If the finisher leading the pour believes curing is busywork, the best specification in the world will not save the slab. Train your leaders on evaporation rate charts, have a curing plan on the pour card, stage materials so nobody is running a mile to fetch a second pail, and empower the finisher to pause saw cutting until compound is reapplied at the joints. These are Concrete Tools as critical as your power trowels.
Real numbers from real jobs
On a distribution center in central Texas, we tracked two adjacent bays, 15,000 square feet each, placed on consecutive mornings with similar mixes, 0.48 w/c, interior space open to wind. Bay A had a single pass of 25 percent solids curing compound applied at half the recommended rate, blankets not used, and fans added overnight to “help it dry.” Bay B used evaporation retardant during finishing, then a full-rate 30 percent solids cure applied just as the sheen disappeared, followed by white blankets sealed to the slab edges for 72 hours. After 90 days, abrasion testing showed the top 2 mm of Bay B had about 25 percent higher surface hardness by rebound hammer correlation and significantly less dusting under forklift traffic. Curl measurements at joints averaged 1/16 inch on Bay B, 3/16 inch on Bay A. The cost difference in curing materials and labor was roughly 12 cents per square foot. The grinding and densifier schedule on Bay A exceeded Bay B by 80 cents per square foot.
On a parking deck in a northern climate, early fall pours saw daytime highs near 65 F and nighttime lows near 40. Where blankets went down immediately after broom finish and stayed for 7 days with periodic rewetting, the surface remained tight through winter salt exposure. Where blankets were pulled after 24 hours to keep schedule, scattered popouts and scaling appeared by March, even though the mix had air entrainment. The common thread was the first night’s temperature drop combined with a desiccated surface.
What edge cases teach us
High-performance mixes with supplementary cementitious materials like slag or fly ash can be more sensitive to poor curing at the surface. Slag cements in particular can lag in early hydration at cool temperatures. If you treat them like straight portland cement in autumn, you risk an underdeveloped skin. Plan for longer, warmer curing, or adjust mix proportions and admixture dosage.
Very low water-cement ratio concrete, 0.40 and below, has less free water available. It needs curing even more, not less. I see the opposite assumption too often - that a “dry” mix doesn’t need curing. The capillary network will empty faster and starve hydration at the surface if you allow evaporation to run. Use blankets or water cure diligently.
Tilt-up panels add another twist: the casting bed robs and supplies heat differently. Panels cast on steel forms or pale casting slabs will hold moisture and moderate temperature more than panels exposed to dark aggregate beds in sun. Time the cure and shade accordingly. When panels are lifted, edges that were top surfaces become wall faces. A weak edge from improper curing will show as chipping during lifting or as scaling in service.
What Concrete Contractors should tell clients who push for speed
A gentle, simple script helps. “We can give you access faster, but it risks the surface strength and may increase long-term maintenance. If we cure for three days with blankets and limit airflow the first night, you save money later. If you need to get on it sooner, we can discuss admixtures for faster strength and schedule dehumidification for drying, but we will not skip curing.”
Clients respect clarity. Offer two options with costs and consequences. Use photos of past projects to show dusting or scaling that followed poor curing. When you frame it as quality control, not delay for delay’s sake, most people choose the smarter path.
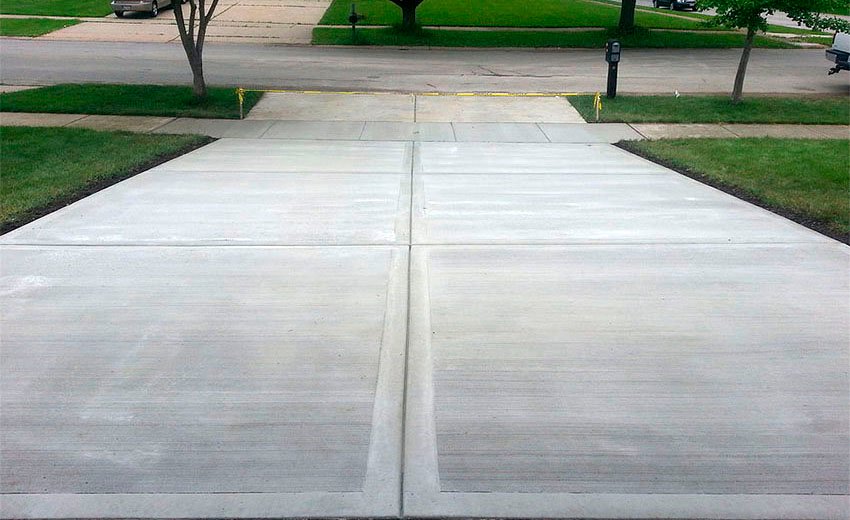
The two mindsets on site
Many crews still carry the “dry it out” mindset. The better crews show a different pattern. They act early to protect water at the surface, they respect the evaporation rate, and they treat the first 72 hours as sacred. They use Concrete Tools that fit a curing-first strategy: fog nozzles that create a fine mist above the slab, spray equipment that achieves uniform film thickness, blankets cut to fit bays without gaps, infrared thermometers to check surface temperature at dusk, and low-speed floor fans kept off fresh work until curing is complete and drying is intentional.
Here is a compact field checklist you can tape to the pour card.
- Check the forecast and calculate evaporation rate from air temp, concrete temp, RH, and wind. If above roughly 0.2 lb/ft²/hr, plan mitigation. Stage curing materials at the slab edge and verify application rates by coverage area, not by “a can per bay.” Start curing as soon as finishing allows without marring. Re-establish curing immediately after saw cutting. Seal edges and corners as carefully as the field. Keep blankets or sheets tight and continuous for at least 72 hours unless specs demand longer. Document internal temperature and air conditions for the first day. Use that record to adjust the next pour’s cure plan.
When tools betray you
Not every product suits every job. I have seen low-solids curing compounds flash off under hot lights in big-box retail builds, leaving patchy film and a false sense of security. I have seen breathable blankets that were anything but, trapping heat without holding moisture. Trial on a small area pays. Spray a test patch at specified rate, allow to cure, and do a plastic sheet test 24 hours later; the area under the sheet should show less color change if the membrane is performing. For blankets, lift an edge 12 hours after application; if the surface looks dry or dusts on your finger, you have a sealing problem.
Also watch pump water and finishing aids. Water added at the nozzle to improve flow may add enough bleed to tempt early troweling and later scaling. Finishing aids have their place, but they are not cures in a bottle. If you rely on them to substitute for hydration-friendly conditions, you will pay for it.
What to do when you inherit a poorly cured slab
Sometimes you arrive after the damage is baked in. The surface dusts, joints are chipping, and forklift tires track fine powder. You cannot rewind the hydration clock, but you can stabilize. Densifiers can help by reacting with available calcium hydroxide to form additional C-S-H, especially if the surface is still calcium-rich. Multiple, generous applications with proper dwell can improve abrasion resistance. Grind lightly first to remove the weakest skin, then densify and burnish. Where scaling has started, a polymer-modified overlay may be warranted, but it needs a sound substrate. Moisture testing is essential if a coating or floor covering will be applied. Expect to discuss saw-cut joint treatment, load transfer dowel retrofits where curl is excessive, and tighter maintenance. The bill will dwarf the cost of blankets and cure compound you didn’t use.
Better specs, better behavior
Specifications drive behavior for Concrete Companies and subs. Vague language like “apply curing compound as required” invites thin films and short durations. Be explicit. Require application rate by square footage per gallon, timed to loss of sheen, verified by daily logs. For water curing, require continuous wetness and edge sealing. For interior slabs destined for flooring, state compatibility of curing method with adhesives or require wet curing or sheet curing. Tie payment to documentation of curing activities. Add evaporation rate as a site condition to monitor, the same way you monitor slump and air content.
A good spec protects everyone. It protects owners from weak surfaces and protects Concrete Contractors from being forced into bad choices by a rigid schedule. When you document curing records, you have leverage when someone wants to cut a day off the timeline.
Where drying belongs in your plan
There is a place for drying, and it begins after curing has done its job. Once you have Dallas Concrete Contractor protected hydration for the first few days and the slab carries the early loads you expect, then think about moisture departure at a pace that matches your end use. If a moisture-sensitive flooring is coming, bring in dehumidification and temperature control. Measure, do not guess. Drying should be a controlled, separate phase, not a byproduct of neglecting curing.
The mental shift is simple. For the first days, you are a hydration manager, not a drying manager. Your job is to keep water in and temperature moderate so the chemistry can run. Only later do you encourage moisture to leave. If you keep that sequence straight, the rest of your decisions fall in line.
The bottom line for Concrete Companies
Curing is not an optional add-on. It is part of placing concrete, just like bull floating and saw cutting. Treat drying as a separate, later process, not as “helping the cure.” The surface you build or ruin in the first 24 to 72 hours governs most of the performance your client will notice. Concrete Contractors who consistently deliver durable work do a few practical things very well: they measure the environment, they choose curing methods that truly retain moisture, they time application with the finish, they protect edges and joints, and they document.
That approach doesn’t slow a project. It stabilizes it. If your crews adopt a curing-first discipline, you will see fewer callbacks, stronger surfaces, and better margins. And the next time someone says, “Let it dry,” you’ll know better, and you’ll have the tools and language to steer the job in the right direction.
Dallas Concrete Contractor
8780 Park Ln, Dallas, TX 75231
(945) 202-8142
https://dallasconcretecontractor.net/wp-content/uploads/2023/07/cropped-concrete-contractors-dallas-tx-logo.png
This is Dallas Concrete Contractor Facebook page
https://www.facebook.com/people/Concrete-Contractors-Dallas/100094373215692
This is Dallas Concrete Contractor Twitter page https://x.com/Concretedallas1
This is Dallas Concrete Contractor Pinterest profile https://www.pinterest.com/concretecontractorsdallas1/