Walk around any neighborhood and you will find dozens of flatwork projects sitting directly on the ground: patios, shed pads, sidewalks, small garages, greenhouse floors. Most look straightforward, but the ones that last share a common trait. Someone made the right call about whether the slab needed footings. Pouring a concrete slab without footings can be perfectly appropriate, provided you match the slab to the soil, climate, and load. Miss that match and you invite cracking, settlement, frost heave, and expensive repairs that a little planning would have avoided.
This guide distills what experienced concrete contractors check before they schedule the cement truck. It is not a replacement for your local building code or a stamped design. It is a practical filter to help you decide when a slab-on-grade with no traditional deep footings will perform and when it is asking for trouble.
What “no footings” really means
In residential and light commercial work, “footings” usually means a widened, deepened concrete element that carries walls or columns and transfers their loads below frost depth or to stronger soil. A typical house would have continuous strip footings 16 to 24 inches wide and 8 to 12 inches thick at a depth that avoids frost, with a foundation wall on top and the slab poured inside.
A slab without footings, often called slab-on-grade, sits directly on compacted base. It relies on slab thickness, reinforcement, and proper subgrade preparation to spread load. There may still be thickened edges, but they do not extend to frost depth and they are integral to the slab rather than separate footings. For small structures or non-structural flatwork, this approach is common and code-compliant when used correctly.
Think of it as a spectrum. On one end, thin unreinforced patios on stable soil need nothing more than good base and joints. On the other, a pole barn or garage with vehicle loads often uses a thickened edge slab, sometimes called a turned-down slab, that acts like a shallow foundation even though it is poured monolithically. The suitability depends on four factors: soil, climate, load, and movement control.
Where codes usually allow slab-on-grade without footings
Local codes vary, so always verify your jurisdiction. Still, patterns are consistent across the U.S. and Canada.
For non-habitable, light-duty structures, many codes allow a floating slab if it is not supporting a load-bearing wall that transfers significant loads to the perimeter. Examples include detached sheds, small workshops, open carports with posts on piers, and patios. In frost-prone regions, codes often specify one of two routes. Either you place the foundation below frost depth, or you design the slab to “float,” meaning it can move with seasonal frost without damage to the structure. A true floating slab is isolated from posts and walls by slip joints or separate piers. The walls, if any, sit on the slab but are not relying on it to remain at a fixed elevation.
Sidewalks, driveways, and patios almost never have footings. They succeed because their loading is distributed and the design anticipates some seasonal movement. Garages and pole barns occupy a gray area. Many jurisdictions permit a thickened-edge slab that is 12 to 24 inches deep at the perimeter, 12 to 24 inches wide, with rebar, provided the building is not heated year-round and the site is well drained. Once you heat a space or add masonry or heavy walls, expect the inspector to require frost-protected shallow foundations or conventional footings.
Detached accessory buildings under a certain size, often 200 to 400 square feet, may be exempt from a permit. That does not change the physics. The soil still matters, and a poorly detailed slab will still crack and settle.
The soil decides more than you think
If I had to choose one variable that makes or breaks a footing-free slab, it is subgrade quality. I have poured slabs on five-inch compacted crushed stone over well-drained sand and returned years later to see barely a hairline crack. I have also watched slabs on expansive clay tear themselves apart within a season.
Granular soils like well-graded sand and gravel handle slab loads gracefully. They drain, they compact tight, and they distribute load. Silts and clays are trickier. They swell when wet and shrink when dry. Some clays, particularly those with high plasticity, can expand several percent in volume with moisture. That movement fights your slab and wins if you do nothing about it.
Before you plan to skip footings, dig at least a couple of test holes 18 to 24 inches deep where the slab will go. If you find clean sand or gravel, you are in good shape. If you find soft, dark topsoil, organic debris, or spongy fill, remove it all and replace it with compactable base. If you hit clay, call it what it is. If it forms a ribbon when squeezed between your fingers and sticks like gum to your shovel, it needs careful handling. On questionable sites, a geotechnical letter is money well spent. One hour of soil advice beats chasing cracks for years.
For fill, ask when it was placed and how. Loose construction fill can take months to consolidate. If someone dumped trench spoils and leveled them with a skid steer, do not set a slab on that without compaction in lifts. At a minimum, use 4 to 6 inches of crushed stone compacted in two lifts with a plate compactor. For vehicle loads or poor native soils, 8 to 12 inches is more realistic. The base should be visually uniform, firm underfoot, and not pump water when you walk on it.
Frost, heave, and the floating slab idea
If frost penetrates into your soil, it can lift a slab. The amount depends on three variables: frost depth, available moisture, and frost-susceptible soil. Silts are the worst; they wick water, then heave when it freezes. Well-drained sands and gravels heave far less.
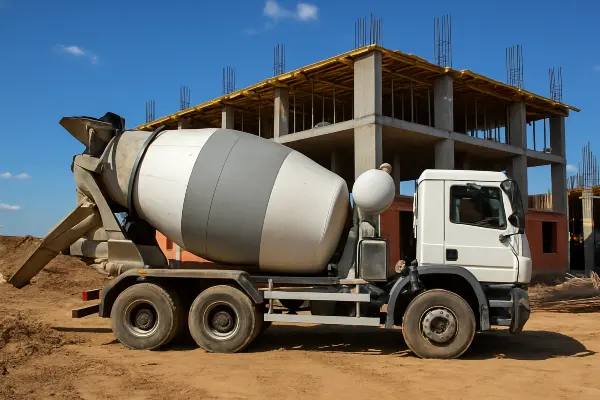
You can work with frost in two ways. Either you take the foundation below design frost depth, or you prevent the conditions that allow heave under the slab. For footing-free slabs, prevention is the usual plan. That means removing frost-susceptible soils, providing drainage, using a non-frost-susceptible base, and insulating if appropriate.
For unheated slabs, you can often get away with a robust base and good drainage. I like to crown the subgrade so any water drains out before it has a chance to freeze under the slab. In cold climates, adding rigid foam under and at the edges mitigates frost impact. A frost-protected shallow foundation wraps the perimeter with vertical foam and extends horizontal insulation out from the edge to keep frost from moving underneath. Even if you are not building a heated home, a scaled-down version near the edge of a thickened slab can stabilize a garage or shop floor.
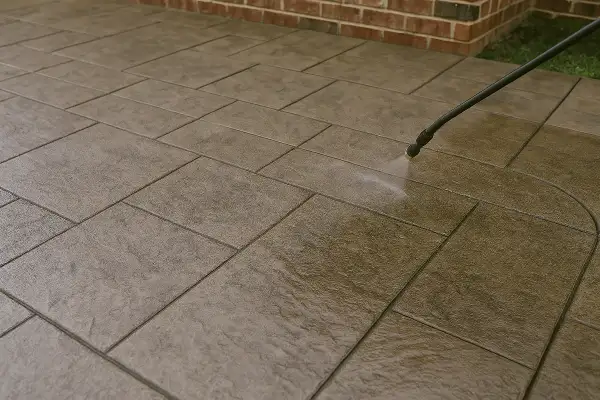
One caution: if posts or walls are supported separately on piers that extend below frost, isolate them from the floating slab with a compressible joint. Otherwise, the slab will rise and fall around the fixed post and crack there.
Loads and the spectrum of duty
Match thickness and reinforcement to what the slab will carry. Residential patios and sidewalks deal mostly with people and furniture. Garden sheds see a lawn tractor and some shelving. Garages see parked cars and sometimes lifts. Shops bring in lathes, safes, and stacked materials.
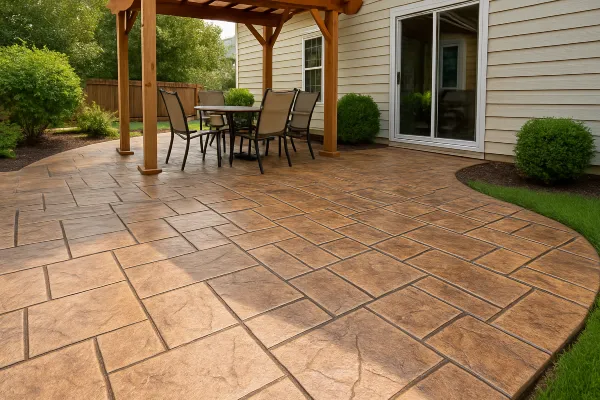
As a rule, light-duty patio slabs can work at 4 inches thick with welded wire mesh or fiber-reinforced concrete, provided the base is sound. For driveways that see passenger vehicles, 4 to 5 inches is typical on good base. For a detached garage, I aim for 5 inches, sometimes 6, with #3 or #4 rebar on 18-inch spacing each way, 2 inches up from the bottom. At the perimeter, I thicken the slab to 12 to 16 inches and run two continuous bars around the edge. That monolithic thickened edge spreads the load like a shallow footing without going to frost depth.
If you plan to support point loads, such as a two-post automotive lift or a heavy milling machine, the slab needs localized thickening and more steel. The manufacturer will specify minimum thickness and psi strength. For lifts, I have poured 6 to 8 inches at the column locations, 4000 psi mix, with added rebar cages. Without such measures, a slab without footings can crack or punch around concentrated loads.
Weight is not the only load. Uplift and lateral from wind matter for small buildings. If the walls bear on the slab and the slab floats, you need to anchor the walls to something that will not move differently than the slab. One common solution uses separate piers for anchor bolts and posts, with the slab isolated. Another anchors to the thickened edge that acts as a turn-down beam.
Drainage is structure
I have repaired more slab problems caused by water than by anything else. Water under a slab reduces bearing capacity and encourages frost heave. Water at the edge undermines thickened sections. Standing water on top finds its way into microcracks, then pries them open when it freezes.
Treat drainage as part of the structure. Grade the site so water moves away from the slab in all directions. Maintain positive slope for at least several feet. If you are building into a hillside, consider a shallow perimeter drain. Place a layer of washed stone under the slab to break capillarity. Use a vapor retarder under interior or conditioned slabs to control moisture migration. For exterior slabs, think about where downspouts discharge and keep them away from the edges. I have seen a single splash block drenching a slab edge cause seasonal heave and a curled corner that never settled back.
Reinforcement, joints, and the art of controlled cracks
Concrete will crack. Your job is to decide where and how. Slabs without footings rely more on reinforcement and joint layout to control cracking because they do not have deep foundation elements restraining movement.
For small patios, a fiber-reinforced mix can keep microcracks tight. The fibers help right where you need them, near the surface. For slabs that carry more load, deformed rebar is better than welded wire mesh. Mesh often ends up on the bottom because it gets walked down during the pour. Rebar on chairs or dobies stays where you put it.
Control joint spacing should roughly equal 24 to 30 times the slab thickness. For a 4-inch slab, that means joints every 8 to 10 feet in both directions, and no panel should be long and skinny. Keep the length-to-width ratio under about 1.5 to reduce random cracking. Saw cut within 4 to 12 hours after finishing, depending on temperature and mix. The cut depth should be one quarter the slab thickness. If it is shallow, it won’t do its job.
At edges and openings, add steel. Around door openings in garages, I run diagonal bars to intercept reentrant corners, the little L-shaped corners that love to crack. Place a perimeter bar a few inches in from the edge of the slab to reduce edge curling and chipping. Where the slab meets columns or pipes, create isolation joints to allow movement.
Real-world scenarios that work without footings
A backyard patio on well-drained sandy soil can perform for decades without https://www.gamespot.com/profile/raygarjhcx/ a footing. I prefer 4 inches of concrete over 4 to 6 inches of compacted crushed stone, fiber in the mix, and clean saw cuts at 8-foot panels. Where the patio meets the house foundation, I leave a half-inch expansion joint to maintain separation. If the house has a deep foundation, I do not want the patio tied to it. They will move differently.
A detached shed in a temperate climate does well on a floating slab if the site is stable. I thicken the edges to 12 inches and run two #4 bars around the perimeter. Inside the slab, I place #3 bars on a 24-inch grid. The walls sit on treated sill plates anchored to the thickened edge with wedge anchors. If the shed is in frost country, I isolate any posts with separate piers below frost and keep the slab floating with a compressible joint.
A single-stall garage for a passenger car can use a monolithic turned-down slab where allowed by code. I pour 5 inches in the field, thicken the edges to 16 inches deep and 16 inches wide, two #4 continuous bars in the turn-down, and dowels across the door opening. Under the slab, 8 inches of compacted stone is my default. On clay soils, I either deepen the base or look at a shallow frost-protected design using 2 inches of rigid foam under the slab and vertical foam at the edge, with horizontal wing insulation extending out 24 inches. It keeps frost from creeping under and reduces heave risk.
For a pole barn, I never rely on the slab to carry the building. The posts belong on proper piers or embedded below frost depth with uplift protection. The slab then floats between them. If someone insists on tying the slab to the posts, I warn them they are mixing elements that want to move differently. Separation avoids cracks at every post.
When you should not skip footings
Some conditions send a clear signal to invest in footings or an engineered alternative. Expansive clays with a high plasticity index will push and pull a slab through the seasons. On those sites, shallow slabs benefit from subgrade replacement with non-expansive material, under-slab moisture control, and sometimes post-tensioning to keep cracks tight. If that is not feasible, a conventional foundation below the active soil layer is more reliable.
Steeply sloped sites or places where you need to cut and fill to make a level pad favor footings or grade beams. Fill settles. A “floating” slab that straddles cut on one side and fill on the other will differentially settle and crack along that line. Either over-excavate and replace with engineered fill, or tie the structure into the stable ground with footings.
Heated living spaces, masonry walls, and heavy equipment push you toward foundations that control movement better than a simple slab-on-grade. Once you are insulating and finishing space, the cost of proper support pays back quickly in comfort and durability.
Finally, if the code official tells you footings are required, that is the end of the debate. If you have a good case for a slab-on-grade with a thickened edge or frost-protected shallow foundation, bring calculations and details. Most inspectors will listen if you show you understand load paths, frost, and drainage.
Mix design, finishing, and curing matter more without footings
A slab without footings has less redundancy. That makes concrete best practices critical on the day the cement truck arrives.
Avoid soupy mixes. Extra water weakens concrete, increases shrinkage, and invites surface dusting. If you need workability, use a water reducer rather than adding water on site. For exterior slabs, air-entrained concrete improves freeze-thaw resistance. In cold climates, I rarely pour an exterior slab without 5 to 7 percent air.
Place rebar on chairs so it stays in the bottom third of the slab. Bars on the ground do little. Strike off, bull float once, and wait for bleed water to evaporate before finishing. Troweling bleed water into the surface traps it and weakens the top layer. On hot, dry, or windy days, plan ahead with windbreaks, fogging, or an evaporation retarder. Early cracking from rapid moisture loss is avoidable with simple precautions.
Cure the slab. That single step separates durable slabs from problem jobs. Keep the surface moist for at least a week, either by wet curing with coverings, using a curing compound, or both. Curing reduces curling, strengthens the surface, and lowers shrinkage cracks. On exterior work that needs sealer, make sure the curing compound is compatible or plan to mechanically remove it later.
A practical checklist before you skip footings
- Soil: Verify native soil type and bearing. Remove organics and replace poor soils with compacted base. Consider a soil pro if you see clay or fill. Climate: Account for frost. Use non-frost-susceptible base, drainage, and insulation where needed. Keep floating slabs isolated from frost-protected piers. Loads: Match slab thickness, reinforcement, and edge thickening to expected loads. Add localized thickening for point loads. Drainage: Slope grade away, manage downspouts, and provide under-slab drainage layers. Consider vapor retarders for interior slabs. Details: Place rebar correctly, lay out control joints thoughtfully, isolate reentrant corners, and follow curing best practices.
Tools, crew, and sequencing that help
A small crew with the right concrete tools beats a crowd with shovels. For prep, a plate compactor is non-negotiable. You cannot hand tamp your way to a reliable base. A laser level or rotary laser pays for itself in one garage by eliminating birdbaths and high spots. Screeds, magnesium floats, an early-entry saw for crisp joints, and rebar chairs should be on the truck. I keep expansion joint material, foam, and edge forms ready, because site quirks always show up the morning of the pour.
Scheduling the cement truck is part art, part weather forecast. I watch temperature, wind, and dew point. Hot days accelerate set and shrink timeline, so I reduce the mix temperature with chilled water or schedule the pour early. Cold days slow the set; blankets and accelerators help, but avoid pouring on frozen ground. Thaw it first or wait. A slab on frozen subgrade looks fine for a week, then drops when the ground thaws and voids appear.
For homeowners hiring concrete contractors, ask how they handle joints, curing, and base compaction. The answers tell you more than the estimate. If the contractor says “we just cut the next day, if we remember,” look elsewhere. If they propose a 3-inch patio because it saves concrete, ask about subgrade and reinforcement. Three inches leaves no margin for error. Four gives you durability for pennies more per square foot.
Cost trade-offs and where to spend
The money you do not spend on footings needs to land somewhere else. Good base and proper reinforcement are first. Upgrading from 4 inches of base to 8 inches costs less than adding footings and delivers reliability in soft soils. Rebar is cheap insurance compared to tearing out a cracked slab. Foam at the edges in cold climates is not free, but it is minor compared to repairing heaved corners.
If you are tempted to save by using a cheaper mix, think twice. The difference between 3000 and 4000 psi concrete is small relative to the job cost, and the higher strength mix reduces risk on slabs that will see heavier loads. Save money by simplifying geometry and minimizing reentrant corners rather than cutting structural corners. Straight edges and square panels crack less and finish faster.
Edge cases I watch for
Long, narrow slabs like sidewalks behave differently. They curl and crack if joints are too far apart or if the base is uneven. I keep panels to 5 to 6 feet on sidewalks and use a full-depth control joint at each division. Around pools, chemistry is the enemy. Use high-quality air-entrained concrete, seal the surface, and keep joints clean to avoid delamination and spalling from chlorinated water.
In arid regions, the problem is not frost but moisture swings. Clay soils still move seasonally as irrigation waters the yard and then dries. In those climates, manage irrigation near slab edges. I have seen a perfect garage slab curl along the driveway side because a sprinkler soaked that edge daily while the interior stayed dry. Consistent moisture conditions matter as much as initial prep.
For industrial equipment or safes, even in small shops, I ask for weights and base dimensions. A 2,000-pound safe on a 2-by-3-foot base exerts more than 300 pounds per square foot, which is manageable. A 6,000-pound CNC mill on narrow feet may exceed what an unreinforced 4-inch slab can handle without punching. Better to thicken those spots at the pour than to trench and patch later.
The short answer, backed by experience
You can pour a concrete slab without footings when the soil is competent, the climate risks are managed, the loads are modest or well distributed, and the slab is detailed to move without tearing itself apart. Patios, sidewalks, shed pads, and many detached garages fit that description. Thickened edges and good base prep bridge much of the gap footings normally cover. Add thoughtful reinforcement, jointing, drainage, and curing, and you get a slab that performs.
Skip footings blindly, and the slab becomes the most expensive lesson on the property. Do the small things right, know when to bring in engineering, and let the site tell you what it needs. That judgment, more than any product or trick, is what separates durable slab-on-grade work from the kind that slowly unzips over time.
Name: San Antonio Concrete Contractor
Address: 4814 West Ave, San Antonio, TX 78213
Phone: (210) 405-7125
This is the logo of San Antonio Concrete Contractor https://sanantonioconcretecontractor.net/assets/san-antonio-concrete-contractor-san-antonio-tx-logo.png
San Antonio Concrete Contractor is a local business located at 4814 West Ave, San Antonio, TX 78213
San Antonio Concrete Contractor serves consumers with residential and commercial concrete projects
San Antonio Concrete Contractor offers free quotes and assessment
San Antonio Concrete Contractor phone number is (210) 405-7125
San Antonio Concrete Contractor has the following website https://sanantonioconcretecontractor.net/
San Antonio Concrete Contractor has the following google map listing https://share.google/d8wsdJhNohh11Oyi5
San Antonio Concrete Contractor has this Facebook page https://www.facebook.com/profile.php?id=61581404267593
San Antonio Concrete Contractor has this twitter profile https://x.com/SanAntConcContr
San Antonio Concrete Contractor has this Pinterest profile https://www.pinterest.com/SanAntonioConcreteContractor/
San Antonio Concrete Contractor has the following Linkedin page https://www.linkedin.com/in/san-antonio-concrete-contractor-846606388/
San Antonio Concrete Contractor has this Youtube channel https://www.youtube.com/@SanAntonioConcreteContractor
San Antonio Concrete Contractor serves residents near Thomas Jefferson High School
San Antonio Concrete Contractor provides services near The Alamo.
San Antonio Concrete Contractor helps residents close to San Antonio Police Department at 3635 E Houston St, San Antonio, TX 78219